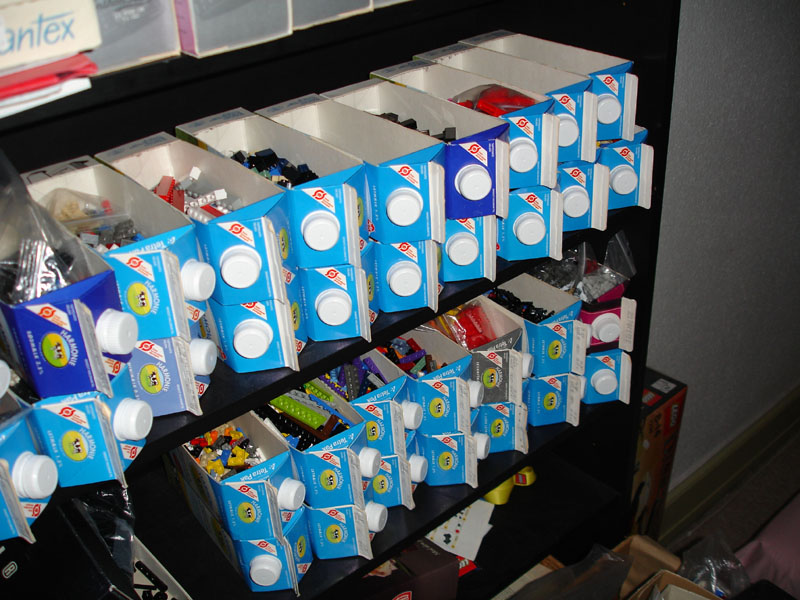
Recycle Tetra Pack fluid containers for excellent storage bins
 With a bit of cleaning and cutting up, Tetra Pak’s basic one litre fluid container can be made into the perfecet storage bin, saving both money and the environment:
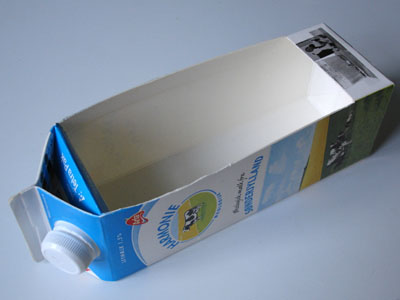
I don’t know how widespread this product is outside Northern Europe, but in Denmark pretty much all fluid foodstuffs are sold in the standard 7x7 cm container (roughly the size of a wine bottle for easy storage in the fridge), so once you start recycling, a normal household will generate a steady trickle of free sorting bins.
 Pro’s:
- Sturdy top and bottom makes stacking (2-3 layers) and handling easy, with a good size for smaller parts such as 1xn plates it help filling the gap between tackle-boxes and small storage boxes.
- No cracks, holes or flaps for parts to drop down into or behind, and no metal clamps that can scratch the parts.
- Free and environmentally friendly
Con’s:
- Needs a bit of measuring and cutting up, this needs to be done within a few days, as sufficient cleaning is difficult before you’ve started cutting (so you can’t have friends or relatives save them up unless they cut them up for you).
- The printing is ugly and somewhat distracting, while water proofing usually come in two variations: tin-foil or white coating that probably isn’t intended for scratching and inhaling (because of the size you rarely have to gruschle much though).
- The one litre-version is probably too small for most people’s storage needs when it comes to 1xn bricks and larger, and you usually have to buy (relatively expensive) fruit-juice to get the larger 2-litre version.
Personally I’ve solved the problem by simply sub-sorting the bricks into two layers of boxes with greyscale in the top row and colours in the bottom row, as well as pruning the boxes (removing most of the odd colours and limiting the number of the more common ones), but since I'm often using 1xn plates where other people would use bricks, this sollution may not work for you.
How to make a storage bin:
Goal and preferences:
First of all, you want to cut the hole in one of the gable sides, and retain the top and bottom for sturdiness and stackability. A part of the side can be folded down behind the top to cover the pyramidical gap-filled space and for added sturdiness.
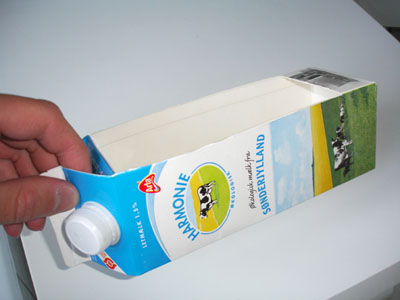
Personally I prefer to use containers with lids like the one in the pictures, but if you're using the original version where you wrench one side of the top open, make sure to staple it well toghether and cut the hole in the opposite side (the stapled side is a bit loose so you get a better grip on the other side).
Walkthrough:
Once the container is emptied, you need to give it a basic cleaning: pour in a bit of water, shake empty and repeat a couple of times. Do not leave off the cutting for more than a couple of days, as the remaining liquids starts moulding or rotting (dairy products can get especially nasty).
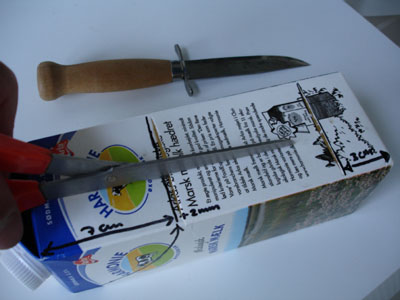
You start by making two cuts across one of the gable-sides ca 3 cm from the bottom edge and 7+0,2-0,3 cm from the top edge below the triangular frame:

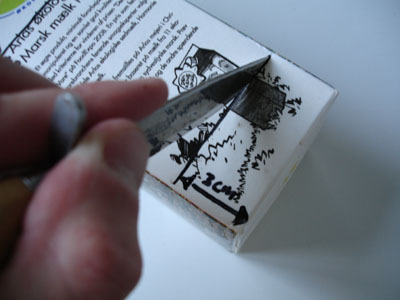
Cut the section between the cuts in halves with a pair of scissors:
Open the flaps and cut them off at the edges. Depending on whether you’re right- or left-handed you can continue one of the cuts to the top of the container:
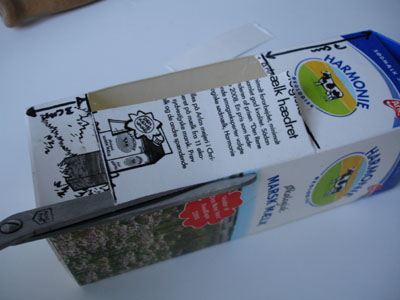

At the opposite edge you continue the cut with the knife:
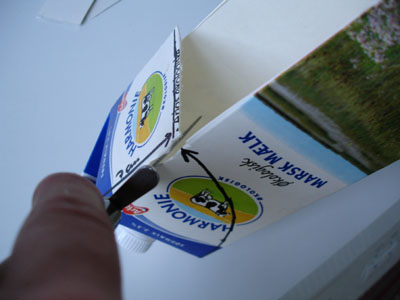
Wash and dry the interior of the container througoughly. Finish off by folding down the flap behind the top. when you fill the box with lego, the flap will be kept in place, but it ought to arch out a bit so you're sure the gap is closed (in principle, the flap ought to be reach the bottom at 7 cm's but in practice it's a little more, which is why I'm usually adding a couple of mm. You might want to adjust this length):

Once you’ve made a small batch of these boxes, you can start transferring your Lego from the usual annoying plastic bags or boxes that are either too small or too big. At the moment I personally have all my 1xn plates, bricks and slopes sorted in these boxes, as well as some of the more important SNOT and technic-categories.
- And with eight empty boxes, I'll just have to decide what I wish to transfer to this much more accesible box-format, perhaps my darkgrey greebles or minifig utensils?